Note that you can use the more simple SSO Google OAuth 2.0 by using this guide: How to login with Google
Step 1) Navigate to https://admin.google.com/ac/apps/unified
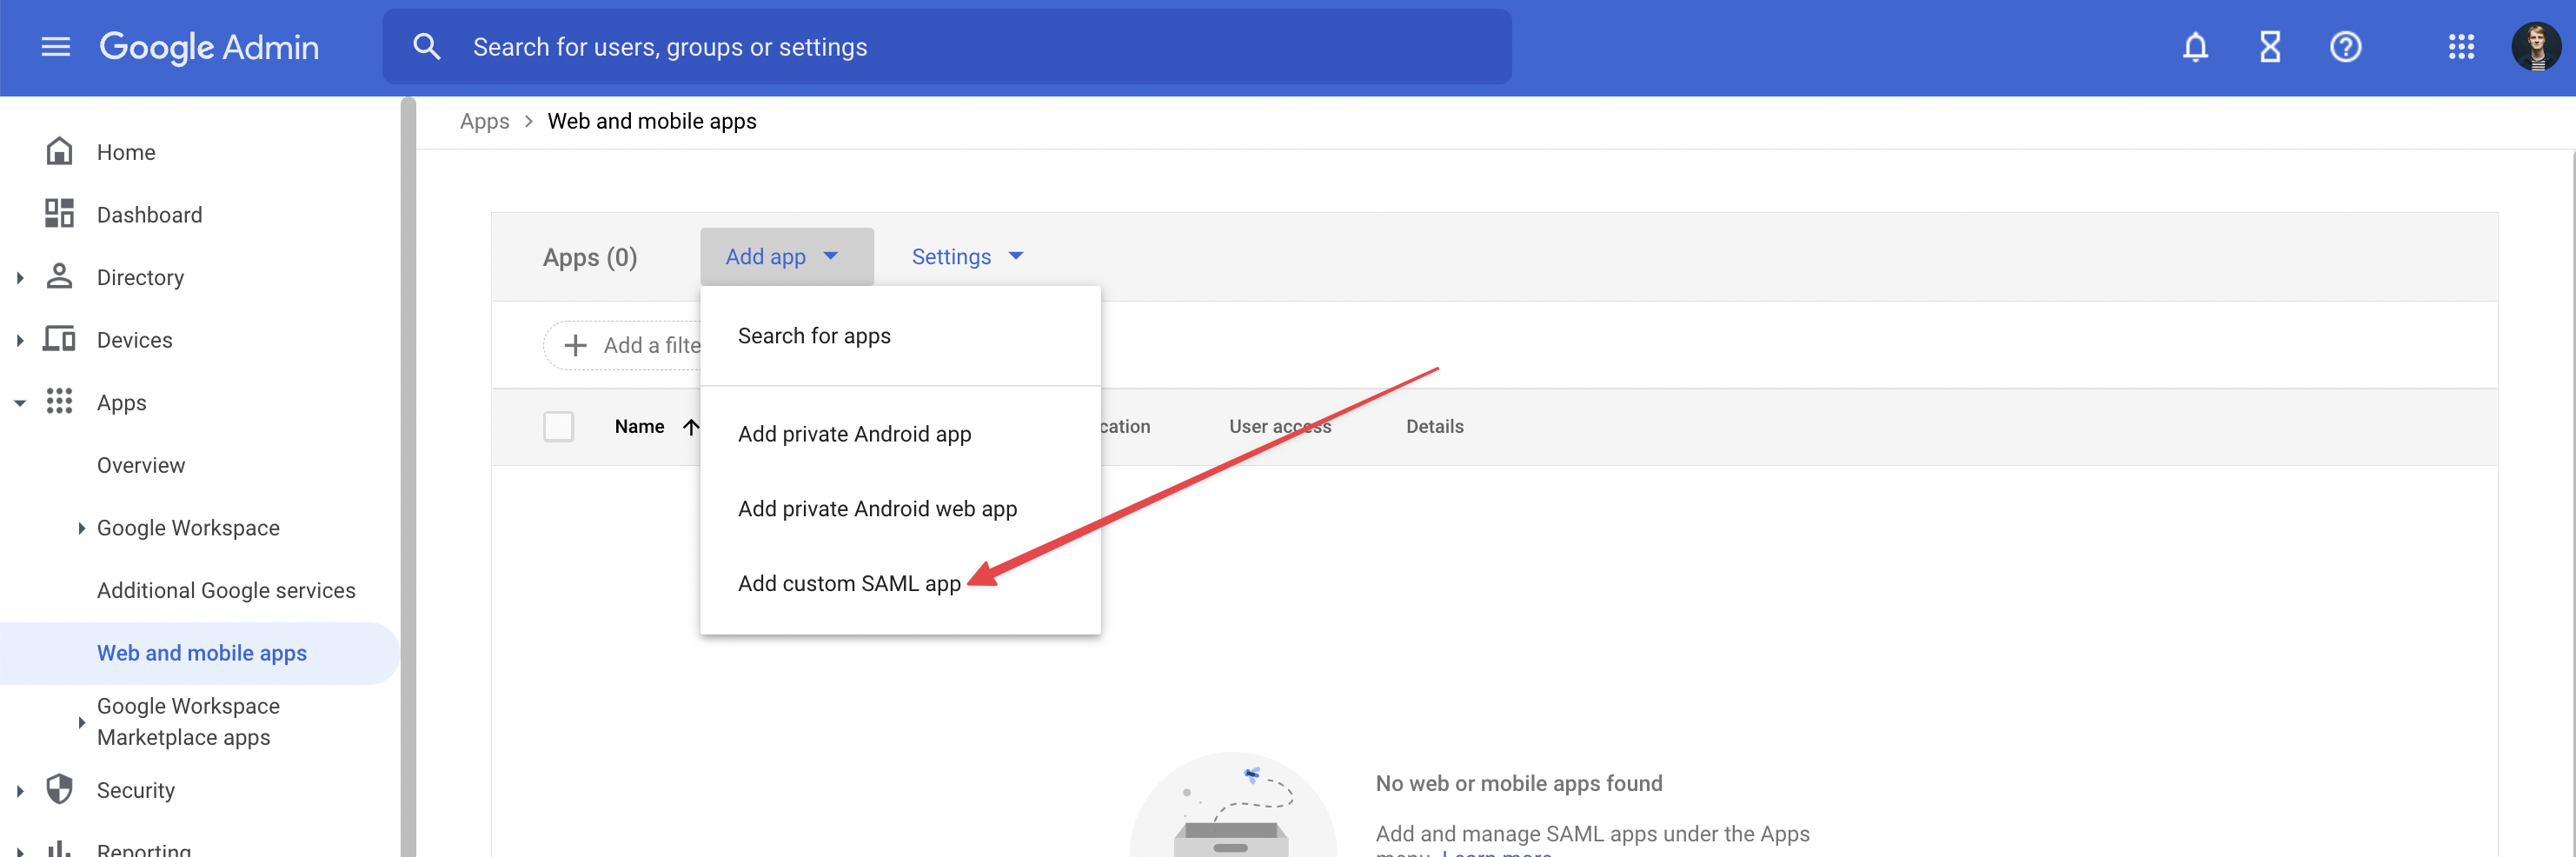
Step 2) Press “Add app” and then “Add custom SAML app”
Step 3) Give the Application a name eg. “Whistleblower Software” and add images as needed. Logos can be found online.
Step 4) Use option 1 and download metadata file
-png.png)
Step 5) Upload the downloaded metadata files in Whistleblower software under “Settings” → “Security settings” → When SAML login is enabled:
-png.png)
-png.png)
Step 6) Press Continue in the Google Admin interface.
Step 7) Under “Services provider details” make sure to:
7.a) Enter ACS URL and Entity ID. These can be found in Whistleblower software under “Settings” → “Security settings” → When Saml login is enabled:
-png.png)
7.b) Enable Signed responses
7.c) Set Name ID format to email and name ID to primary email
-png.png)
Step 8) Under Attribute mapping add the following configuration:
- “First name” → “first_name”
- “last name” → “last_name”
- “Primary email” → “email”
-png.png)
Step 9) Press finish
Step 10) Enable access for users in Google, who needs access to Whistleblower Software:
-png.png)
Notice that it might take some time for Google to add the app, an error like the one below might popup when attempting to sign in:
-png.png)
We hope the article was helpful!
Do you need further assistance or personal help? Fear not - book a meeting with Magnus for extra help or to get answers on any unanswered questions.
You can book a meeting with him right here:Book a meeting with Magnus
Otherwise you are of course always welcome to reach out either by email or phone at support@whistleblowersoftware.com or at +45 71 99 63 83.
